
How To Change The Default Font In Windows 10
Segoe UI is the default font in Windows 10. This default font is used almost everywhere from desktop to file explorer to Settings in Windows 10. Here is a guide on How To Change The Default Font In Windows 10. Many PC users who have used Windows XP for a long time before switching to Windows 10 feels that the Windows XP’s default Tahoma font was superior.
Unlike Windows 7 and earlier versions, changing the default font is not an easy job in Windows 10, thanks to the absence of Window Color and Appearance.

A user at Super User has posted a workaround to change the default font in Windows 10 to a font of your choice. Complete the given below directions to change the default font in Windows 10. You just need to download a Registry file and then merge it with Registry.
Step 1: Download ChangeFont.zip file by clicking here. Please note that the credit for the workaround and registry file goes to Tom at Super User.Change The Default Font In Windows 10
Step 2: Right-click on the downloaded ChangeFont.zip file, click Extract all, select a location, and then click Extract button to get a file named ChangeFont.reg.


Step 3: With default settings, this ChangeFont registry file changes the default Segoe UI font to Tahoma. Please read the instructions in Step 4, Step 5 and Step 6 if you want to change the default font to a font other than Tahoma.
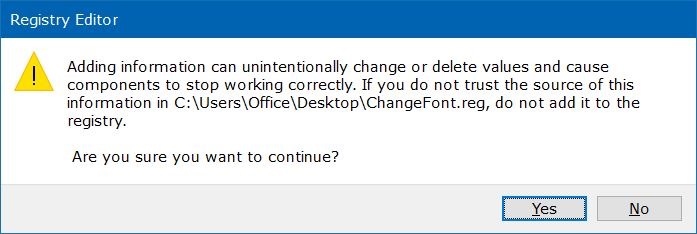
And if you want to set Tahoma as the default font in Windows 10, double-click on ChangeFont.reg file, click Yes when you see the confirmation dialog, and then click OK.


Once done, sign out of your account and then sign in again to see the new font in action. To sign out, click on the user tile on the Start menu and then click Sign out.
Step 4: To change the default font to a font other than Tahoma, right-click on the ChangeFont.reg file, click Open with, and then click Notepad to open the file with Notepad program.
Step 5: Replace the word (mentioned at the end) Tahoma with a font name that you would like to set as the default font in Windows 10. Click Ctrl + S or click File menu and then click Save option to save the changes. For instance, if you want to set Verdana as the default font, replace Tahoma with Verdana. Don’t forget to press Ctrl + S to save.


Step 6: Finally, double-click on the edited ChangeFont.reg file, click Yes button when you see the confirmation dialog, and then click OK button. Sign out and sign in to see the new font.
We hope you liked this article on how to Change The Default Font In Windows 10. If you have any issues with Change The Default Font In Windows 10 then comment below.
Unlike Windows 7 and earlier versions, changing the default font is not an easy job in Windows 10, thanks to the absence of Window Color and Appearance.
How To Change The Default Font In Windows 10

Set your favorite font as the default font in Windows 10
A user at Super User has posted a workaround to change the default font in Windows 10 to a font of your choice. Complete the given below directions to change the default font in Windows 10. You just need to download a Registry file and then merge it with Registry.
Step 1: Download ChangeFont.zip file by clicking here. Please note that the credit for the workaround and registry file goes to Tom at Super User.Change The Default Font In Windows 10
Step 2: Right-click on the downloaded ChangeFont.zip file, click Extract all, select a location, and then click Extract button to get a file named ChangeFont.reg.


Step 3: With default settings, this ChangeFont registry file changes the default Segoe UI font to Tahoma. Please read the instructions in Step 4, Step 5 and Step 6 if you want to change the default font to a font other than Tahoma.
And if you want to set Tahoma as the default font in Windows 10, double-click on ChangeFont.reg file, click Yes when you see the confirmation dialog, and then click OK.

Once done, sign out of your account and then sign in again to see the new font in action. To sign out, click on the user tile on the Start menu and then click Sign out.
Step 4: To change the default font to a font other than Tahoma, right-click on the ChangeFont.reg file, click Open with, and then click Notepad to open the file with Notepad program.
 |
| Change The Default Font In Windows 10 |
Step 5: Replace the word (mentioned at the end) Tahoma with a font name that you would like to set as the default font in Windows 10. Click Ctrl + S or click File menu and then click Save option to save the changes. For instance, if you want to set Verdana as the default font, replace Tahoma with Verdana. Don’t forget to press Ctrl + S to save.


Step 6: Finally, double-click on the edited ChangeFont.reg file, click Yes button when you see the confirmation dialog, and then click OK button. Sign out and sign in to see the new font.
We hope you liked this article on how to Change The Default Font In Windows 10. If you have any issues with Change The Default Font In Windows 10 then comment below.
How To Change The Default Font In Windows 10
 Reviewed by Unknown
on
22:28:00
Rating:
Reviewed by Unknown
on
22:28:00
Rating:
Reviewed by Unknown
on
22:28:00
Rating:


No comments: